

Introduction
How you can make your keyboard by using a few simple materials and tools. This keyboard is perfect for people who want to save money, or for those who are just curious about the inner workings of a keyboard.
With this guide, you can learn how to make a keyboard that is both durable and reliable.
The DIY keyboard is a fun project. You can make your keyboard with a few simple tools and some basic knowledge of electronics.
In this article, we’ll show you how to make a DIY keyboard from scratch. We’ll also provide some tips on choosing the right parts and materials for your project.

What is a DIY Keyboard
A DIY keyboard, or do-it-yourself keyboard, is a keyboard that you can make yourself using simple materials and tools.
This keyboard is perfect for people who want to save money, or for those who are just curious about the inner workings of a keyboard. With this guide, you can learn how to make a keyboard that is both durable and reliable.
What are the Benefits of Making Your Keyboard
DIY keyboards can be a great way to save money or learn more about how keyboards work. By making your keyboard, you can customize it to fit your needs, and you can be sure that it is made with high-quality components.
Additionally, DIY keyboards can be a fun project to work on with friends or family.

How to Choose the Right Keyboard for your Needs
Choosing the right keyboard for your needs can be a daunting task. There are so many different types and brands of keyboards on the market, it can be hard to know which one is right for you.
Here are a few tips to help you choose the right keyboard for your needs:
1. Decide what type of keyboard you need. There are three main types of keyboards: desktop, laptop, and tablet.
Desktop keyboards are designed for use with a desktop computer, laptop keyboards are designed for use with a laptop computer, and tablet keyboards are designed for use with a tablet device.
2. Decide what features you need. Some keyboards have more features than others.
For example, some keyboards have a numeric keypad, while others do not. Some keyboards have backlighting, while others do not. Decide which features you need and which ones you can live without.
3. Decide how much you want to spend. Keyboards range in price from $10 to $200 or more. decide how much you want to spend and shop around for the best deal.
Once you’ve decided on these things, it will be easier to choose the right keyboard for your needs.

The Best Materials and Parts for DIY Keyboards
Before: When it comes to DIY keyboards, there are a lot of different materials and parts that you can use. It can be hard to know which ones are the best for your project.
After: With this guide, you’ll learn about the best materials and parts for DIY keyboards. We’ll cover everything from switches to cases, so you can choose the right components for your project.
Bridge: Whether you’re looking for durability or affordability, we’ve got you covered with our list of the best materials and parts for DIY keyboards.
How to Purchase the Materials you Need
To make a DIY keyboard, you’ll need a few basic materials and supplies. The most important component is the keyboard controller, which converts key presses into digital signals that the computer can understand.
You can buy a keyboard controller online or at your local electronics store. Other materials you’ll need include:
– Keyboard
– Soldering iron
– Solder
– Wire cutter/stripper
– Heat shrink tubing
– Electrical tape
Once you have all of the necessary materials, it’s time to start building.
First, you’ll need to solder the keyboard connector to the keyboard controller. Next, you’ll need to solder the key switches to the keyboard controller.
Finally, you’ll need to attach the key switch caps to the key switches. For more detailed instructions on how to do this, please see our DIY keyboard tutorial.
If you’re not comfortable soldering electronic components, you can also use a premade DIY keyboard kit. These kits include all of the necessary parts and instructions, so they’re a great option for beginners.
When choosing parts for your DIY keyboard project, be sure to select components that are compatible with each other.
For example, some keyboards use a different kind of connector than what is found on most controllers. Also, be sure to check the dimensions of each component before purchasing them, as they may not all fit in the same enclosure.
Building your own DIY keyboard can be a fun and rewarding experience. With a little bit of patience and some basic electronics knowledge, you can create a custom keyboard that meets your specific needs and requirements.

How to Decide on a Layout
When designing your own DIY keyboard, you’ll need to decide on a layout. This is the arrangement of keys on the keyboard. There are many different layouts to choose from, so you’ll need to find one that works for you.
One thing to consider when choosing a layout is the size of the keyboard. You’ll need to make sure that the layout you choose will fit on your keyboard. Another thing to consider is the number of keys.
Most layouts have between 61 and 88 keys, but you can also find smaller or larger layouts if you need them.
Once you’ve chosen a layout, you’ll need to decide on the type of switches you want to use. There are many different types of switches available, so you’ll need to find ones that fit your needs.
Some switches are more tactile than others, while others are louder or quieter. You’ll also need to decide how much force you want your switches to require.
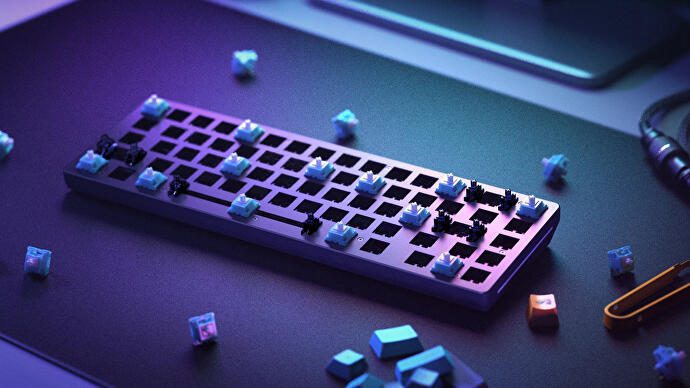
As you’ve chosen a layout and switches, you’ll need to select some keycaps. Keycaps come in many different shapes and sizes,
so you’ll need to find ones that fit your hands and your layout. You can also find keycaps with different colors and designs to match your style.
Finally, you’ll need to select a case for your keyboard. There are many different cases available, so you can find one that fits your style and needs.
Some cases have built-in keyboards, while others allow you to customize the look and feel of your keyboard.
How to Make a DIY Keyboard – Step-by-Step Instructions with Pictures
Making a DIY keyboard is a great way to save money, and it’s also a fun project. In this article, we’ll show you how to make a DIY keyboard from scratch. We’ll also provide some tips on choosing the right parts and materials for your project.
To make a DIY keyboard, you’ll need:
– A keyboard controller
– A microcontroller
– A breadboard
– Jumper wires
– Soldering iron and solder
– LEDs (optional)
– Resistor (optional)
The first step is to assemble the circuit board. Start by connecting the keyboard controller to the microcontroller. Next, connect the microcontroller to the breadboard. Finally, connect the LEDs and resistor (if used).
Make sure all of your connections are secure, and then test the circuit board by typing on the keyboard. If everything is working correctly, you should see the corresponding lights on the keyboard light up.
Next, you’ll need to program the microcontroller with your desired key mapping. This can be done using an Arduino IDE or any other programming language that supports Arduino boards.
Once you’ve finished programming, save your code and upload it to the microcontroller.
The last step is to assemble the enclosure for your DIY keyboard. You can use any material you like, such as wood or plastic. Simply cut out the shape of the enclosure and drill/cut appropriate holes for the buttons and LEDs.
And the following steps will teach you how to assemble the keyboard.
How to Assemble the Keyboard
Now that you’ve gathered all of the necessary materials, it’s time to assemble the keyboard. Start by soldering the switches to the keyboard matrix. The keyboard matrix is a grid of wires that connect the switches to the microcontroller.
Make sure to orient the switches correctly, and use plenty of soldiers to make a strong connection.
Next, connect the microcontroller to the keyboard matrix. Again, make sure to orient the parts correctly, and use plenty of soldiers. Once everything is connected, you can test the keyboard by typing on the switches.
If everything is working correctly, you should see text appear on your computer screen.
If you’re using a DIY keyboard case, now is a good time to install the hardware. Be careful not to damage any of the components during assembly. Once everything is installed, you can finish up by attaching the keycaps and testing the keyboard again.
Congratulations! You’ve just built your own DIY keyboard. However, there is still a great step that is how to test it out and make any necessary adjustments.

How to Test it out and Make any necessary Adjustments
Now that your keyboard is assembled, it’s time to test it out and make any necessary adjustments. First, type a few characters on the keyboard and make sure they appear on your computer screen.
If everything is working correctly, you’re ready to start using your new keyboard.
If you notice any problems with the keyboard, now is the time to troubleshoot. The most common problems are incorrect wiring and poorly soldered connections.
Use a continuity tester to check for shorts and bridges between the pins on the microcontroller and the switches. If you find any problems, correct them before continuing.
Once everything is working correctly, you can start customizing your keyboard with keycaps and accessories. There are plenty of options available online, so take your time and find something that suits your style.
Troubleshooting tips for common Problems with DIY Keyboards
If you are having trouble with your DIY keyboard, here are some tips to help you troubleshoot the problem.
First, make sure that all of the connections are properly made. If a key is not working, it may be because the wire is not connected properly.
Second, make sure that all of the keys are working. If you only have problems with a few keys, then it may be a problem with those keys specifically. Try cleaning the keys or replacing the springs if necessary.
Third, make sure that the keyboard is properly aligned. If the keyboard is not aligned correctly, it may not work properly.
Fourth, make sure that the keyboard is properly lubricated. If the keyboard is not lubricated correctly, it may not work properly.
FAQs about DIY Keyboards
FAQs about DIY keyboards:
1. What type of materials do I need to make a DIY keyboard?
You will need a few simple materials and tools in order to make your own DIY keyboard. The basic materials you will need are a keyboard case, a printed circuit board (PCB), keycaps, switches, a soldering iron, solder, and wire.
2. What type of switches should I use for my DIY keyboard?
There are many different types of switches available for DIY keyboards, so you can choose the ones that best suit your needs. Some popular switch options include Cherry MX switches, ALPS switches, and Matias switches.
3. How do I connect the PCB to the keyboard case?
The PCB can be attached to the keyboard case in several ways. One popular option is to use screws to secure the PCB in place. However, some people prefer to use hot glue or epoxy to attach the PCB.
4. How do I connect the keycaps to the switches?
The keycaps can be attached to the switches by using either screws or pins. Some people prefer screws because they are more secure, while others prefer pins because they are easier to remove and replace.
5. How do I solder the wires between the switches and the PCB?
Soldering is a process of connecting two pieces of metal by heating up the metal until it melts and flows together.
In order for the solder to successfully connect the wires and the PCB, you will need to make sure that both surfaces are clean and free of any oils or dirt.
Conclusion
Making your own keyboard can be a fun, rewarding experience. Not only will you save money, but you’ll also have the satisfaction of knowing that you built your keyboard from scratch.
In addition, building your own keyboard can give you a better understanding of how they work.
This knowledge may come in handy if your keyboard ever malfunctions or stops working properly. Finally, by making your own keyboard, you’ll have a custom-built device that is perfect for your specific needs and preferences.
Thanks for reading our guide on how to make a DIY Keyboard!